Friday, October 4, 2019

HOW I GET VISA WITHOUT BOOKING A FLIGHT TICKET

In order to apply for a visa, in most cases, flight tickets are required. Do you know why are they required! Actually, the visa issuing authorities ask this to ensure that you are actually going to come back from their country & not make an illegal attempt to stay there. However, buying flight tickets is an expensive affair. What happens if the visa application is rejected! Read on to know how to score a visa without having a flight ticket.

How to get flight tickets for a visa without actually buying them!

  • Airlines holding tickets
Some airlines give you the option to hold the tickets, I did with AirAsia and indigo. But through airlines, it is valid for 3-4 hours only.  So I use such tickets just to show to the immigration officer. Usually, I travel overland, so this trick helps me pretty well.
  • Online Travel agencies
Travel agency like Yatra.com gives you the option to hold flight ticket for 3 days. When I applied for my Malaysian Visa, I gave them the ticket which was on hold by Yatra. I did this for getting Thailand’s sticker visa as well. Please note that it is valid only for 3 days, so if the visa takes longer than expected, there is a risk.
  • Online travel agent
I found there are lots of online travel agent who can book a dummy flight ticket. I used this for getting my Chinese visa. The agency was bookingforvisa.com. They charged 20 US$ for 5 flight tickets.  Layover is not considered in this case. Suppose you are flying from India to Germany with a layover in Turkey, so it will be counted as One ticket only.

How I got a Thailand visa without flight tickets!

I got two visas this way. I used this website for getting Thai and Chinese visa. I will be using it again to apply for 2 more visas in the coming days. The best part of buying dummy tickets through an online agent is that tickets are generally valid for 3 to 4 weeks if your flight is not too early. I bought tickets on 26 April and I applied for my Chinese visa on 29 April. Got my Chinese visa on 7 May and then on the same day I applied for Thai Transit Visa, I got it on 9 May.
After 2 weeks, I checked my dummy tickets are still valid.

Benefits of booking dummy tickets for getting a visa

  • It will save a lot of money on actual flight tickets if your visa is rejected.
  • It will also give you the flexibility to travel.  Like my Chinese visa is valid for the next 3 months and I can travel whenever I want.
  • You can also use the dummy tickets for getting a transit Visa.
Feel free to ask questions in the comments.

Check this for finding cheap flight tickets

Once you are done with the visa formalities. You can use this tool to find the cheapest flights for any destination in the world on a given date.

Sunday, September 22, 2019

ITINERARY FOR KOH PHANGAN, 2019 [BUDGET TRIP 15,000 RS / LUXURY TRIP 25,000]

 I visited Koh Phangan for almost a week. Based on my trip, I made a travel series for my youtube channel – MountainTrekker. The first video of the series made many people curious about this destination. This video has almost every information in brief for a first-time traveller. I got a lot of requests for making itineraries for this island. Considering them I am sharing an ideal itinerary for Koh Phangan which may suit everyone’s need. A low budget traveller can do this trip in less than 15,000 Rs, whereas an average budget can be around 25,000 Rs. Add more money to your stay and food to make it more lavish.

An ideal Itinerary for Koh Phangan, Thailand


In this itinerary, I have tried to include almost all must do activities in Koh Phangan with their cost. The itinerary is designed considering an average budget tourist and a tight-budget backpacker. The price/cost shared are indicative and may go up or down in the due course of time.

Day 1

  1. India to Bangkok (Average return flight ticket – 6,000 Rs)
    • Return flight ticket during Sale – 5,000 Rs
  2. Bangkok to Surat Thani (Average return flight ticket – 1,400 Baht or 3150 Rs)
  3. Surat Thani to Koh Phangan (Bus + Ferry = 500 Baht or 1,120 Rs)
  • Stay: Average budget Room –  300 Baht or 675 Rs / Hostel – 120 Baht or 270 Rs
  • Food: Average budget 1000 Rs / Low budget – 550 Rs (Breakfast + Lunch + Dinner)
  • Total cost
    • for average budget tourist =   Rs 11,945 (6000 (flight)+ 3150 (flight) + 1120 + 675 (stay)+ 1000 (food))
    • for low budget tourist = Rs 7,430 (5000 (flight) + 490 (train) + 1120 + 270 (stay) + 550 (food))

Day 2

  1. Koh Phangan Day tour (from 500 Baht or 1,120 Rs)
  • Total cost
    • for average budget tourist =   Rs 2,795 (1,120 + 675 (stay) + 1000 (food))
    • for low budget tourist = Rs 1,940 (1,120 + 270 (stay) + 550 (food))

Day 3

  1. Rent a motorbike and explore the island on your own (starts from 200 Baht or 450 Rs)
    1. Must visit beaches – Mae Haad, Koh Ma, Bottle beach, Thong Nai Pan Yai & Haad Salad
  2. Relax on your favourite beaches (you must have found your favourite till now)
  3. Shopping in Thongsala market or Saturday market (only on Saturdays)
  • Total cost
    • for average budget tourist = Rs 2,125 (Rs 450 + 675 (stay) + 1000 (food))
    • for low budget tourist =  Rs 1,270 (Rs 450 + 270 (stay) + 550 (food))

Day 4

  1. Ang Thong Marine National Park day tour (starts from 2,100 Baht or 4,715 Rs)
    1. cost includes breakfast, lunch, canoeing, snorkelling, hiking
  • Total cost
    • for average budget tourist = Rs 6,015 (Rs 4,715 + 300 (Dinner) + 1000 (stay))
    • for low budget tourist =  Rs 1,700 (Rs 450 (motorbike rent) + 550 (Dinner) + 700 (stay))

Day 5

  1. Buffer day

Day 6

  1. Koh Phangan to Surat Thani (Ferry + Bus = 1,120 Rs)
  2. Surat Thani to Bangkok (Flight ticket price included in Day 1 expenses)
    1. 3rd class ticket in a train 217 Baht or 490 Rs
  3. Departure from Bangkok (Flight ticket price included in Day 1 expenses)
  • Total cost
    • for average budget tourist = Rs 2,120 (Rs 1120 + 1000 (food))
    • for low budget tourist =  Rs 2,160 (Rs 1120 + 550 (food) + 490 (Train))

Total cost of Koh Phangan’s trip

  • for average budget tourist = Rs 25,000 (11945 +  2795 + 6015 + 2125 + 2120 )
  • for low budget tourist =  Rs 14,500 (7430 + 1940 + 1270 + 1700 + 2160)

Wednesday, May 1, 2019

CHEAPEST WAY TO TRAVEL IN TORONTO | PUBLIC TRANSPORT


I visited Toronto in November 2019 and visited a few popular sightseeing places. While travelling in the city I used buses, trams and metros. I came across a day pass for tourist which makes Toronto public transport the cheapest way to explore the city.

Toronto Public Transport

The agency which operates bus, subway & streetcar services in Toronto is called TTC,  Toronto Transit Commission. It is like DTC or Delhi Transport Corporation in Delhi.
  • Bus – operated by TTC. bus fare starts from 3.25 CAD (Canadian Dollar) for a single ride.
  • Subway – Metros are called ‘Subway’ in Toronto. Also operated by TTC, a single ride cost 3.25 CAD
  • Streetcars – Tram is called Street Car in Toronto. It is also operated by TTC, a single ride cost 3.25 CAD

Day Pass TTC Toronto

For Tourist Day Pass are the best option to explore the city. Cost of TTC Day Pass is 13 CAD, but you get unlimited travel for One day. This pass is valid until 5.30 am of the next day. Now I am sharing the best part of this pass. 6 people can travel on a single pass in any transportation mode of the TTC system. TTC sell Group/Family day passes on weekends and statutory holidays. Cost of one such pass is also 13 CAD but valid for 6 people. This includes 2 adults and 4 children between 13-19 years or 1 adult and 5 youths between 13-19 years.

Saturday, April 6, 2019

VISIT BHUTAN : THE LAND OF THE THUNDER DRAGON

VISIT BHUTAN : THE LAND OF THE THUNDER DRAGON
Bhutan, officially called the Kingdom of Bhutan is one of our neighbours which offers ample reason for Indian citizens to visit this beautiful country. This landlocked country is a great tourist attraction and at the same time, perfect for budget travellers. India and Bhutan have had friendly relations for a long time. Bhutan is easily accessible and economical as 1 Bhutanese Ngultrum (it’s currency) equals nearly 1 Indian Rupee. Check this post and start making your plans to visit Bhutan.

No visa for Indian tourists to visit Bhutan

Bhutan has restrictions over tourism, so people from the west need to spend a lot of money to travel to Bhutan but the same doesn’t apply to Indians. Bhutan is quite welcoming towards Indian tourists! In fact, Bhutan and Nepal are the only neighbouring countries of India, where Indian citizens are not required a visa.

Documents required to enter Bhutan

  • Voters Identity card
  • Indian Passport (not mandatory)
  • 2 passport sized photograph
  • Duly filled application form (you’ll get at the immigration office)
To enter Bhutan by road or flight, you require either a valid Indian passport with a six months validity or a Voters Identity Card (VIC). Aadhar is not an acceptable document to enter in Bhutan. After submitting the above-mentioned documents at the immigration office you’ll get an entry permit. It usually takes 1 hour to get the entry permit of Bhutan at the Phuntsholing border.

Documents required to enter Bhutan with own vehicle

  • Entry permit issued by the Bhutanese Immigration department
  • Driving licence
  • Vehicle’s Registration certificate of vehicle
  • PUC (Pollution under control) certificate
  • A simple application to get the vehicle’s permit, addressing Sr. Regional Transport officer, Phuentsholing, Bhutan (There is no prescribed format)
If you wish to drive your vehicle (car or motorcycle) registered in India, you are required to obtain a Route Permit from the Road Safety and Transport Authority office in Bhutan after obtaining the entry permit from the Department of Immigration.
How to reach Bhutan from India
Bhutan by train:
The nearest railway station from Phuntsholing border is Hasimara (West Bengal). Catch a train from New Jalpaiguri (Siliguri, West Bengal) and then take a shared auto to Jaigaon/Phuntsholing border. You don’t need a reserved seat on the train since it’s not very crowded and the journey is not very long. It takes around 3 hours. The route from New Jalpaiguri to Hasimara is quite scenic. Trains pass through a jungle which is home to elephants. Indian Railways operate all the trains at slow speed for the safety of elephants.
  • Hasimara railway station to Phuntsholing border – 19 kilometres
Bhutan by Road:
Phuntsholing is the gateway to Bhutan. The entry point is known as Jaigaon/Phuentsholing border. Jaigaon is on the Indian side of the border and Phuentsholing is on the Bhutanese. You can get a direct bus for Phuntsholling from Siliguri. There is also a direct bus service from Kolkata’s Esplanade bus terminal to Bhutan.
  • Siliguri to Phuntsholing border – 156 kilometres
Bhutan by air:
You can travel to Bhutan by flight but it not recommended as it is expensive. Two flights connect India to Bhutan, Bhutan Airlines and Druk air. These flights operate from Indian cities like Delhi, KolkataGuwahati, etc. These flights take you to Paro Airport, which is the only international airport in the country. Flight from Kolkata to Paro takes 1 hour 10 minuteswhereas Guwahati to Paro takes 55 minutes

Airports in Bhutan

  1. Paro Airport is the only international airport in the country.
  2.  Yongphulla Airport in Trashigang is a small domestic airport that underwent upgrades through 2010. Yongphulla Airport was scheduled for completion in January 2010 but as of January 2015, the airport remains closed due to ongoing runway repair.

Embassy of Bhutan in India, New Delhi

  • Address: Royal Bhutanese Embassy, Chandragupta Marg, Chanakyapuri, New Delhi 110021.
  • Contact Numbers 011-26889230, 26889809, 26889807
  • Websitehttp://www.mfa.gov.bt/rbedelhi/

Royal Bhutanese Consulate, Kolkata

Useful Websites

Other valuable tips

  • For travel between cities, buses are the cheapest. They run on fixed times every day but there are only 1-2 buses to a particular destination in a day.
  • Food is not expensive. You can eat at nice restaurants without spending too much money.
  • Do not take any tourism packages. They will unnecessarily charge you a lot of money.
  • No need to plan in advance. The people are friendly and will help you in need.
  • You are not required to spend a minimum amount of 250 US dollars per person per day like the western tourists. Indians are exempted from this rule.
  • You do not need to submit any pre-planned itinerary anywhere. Feel free to travel at your will. But note that you will be issued travel permit only for the town of Thimphu and Paro from the border town of Pheuntsholing. To travel further, you need to obtain a permit from Thimphu immigration office.
  • The cheapest and the best way to travel within Bhutan is the Coaster Bus which is a 40 seater bus, operated by various private bus owners.
Best time to visit Bhutan
March, April, May, September, October & November are the best months to visit Bhutan. Spring season from March to May is the best time for nature lovers when the rich and vibrant colours of flora can be seen.  The moderate temperature during Autumn is a good reason to visit Bhutan between September & November.

ENTER NEPAL BY OWN CAR/BIKE http://videshtrip.blogspot.com/2019/01/documents-required-to-enter-nepal-by.html

Currency
1 Nu (Ngultrum) = 1 Rupee (approx)
(Ngultrum is pronounced as Naltram) Indian Rupee is happily accepted everywhere.

Time
+0600 GMT or +0030 IST
(In Layman’s language = if its 1:00 pm in India, it will be 1:30 pm in Bhutan)

Fuel
Petrol is cheaper than India
Hotels
Popular Tourist places – Starting from Nu 500 to Star hotels
Less popular places – Starting from Nu 250 to Nu 700 or maybe more

Altitude
Phuntsholing – 200 metres
Paro – 2240 metres

Some useful Bhutanese words
  • Guzuzangpo – Namaste (in Hindi), Hello
  • Kadinche – Thanks
  • La – Sir, Ji (in Hindi)
  • Lhakhang = Temple

EGYPT VISA FOR INDIANS : HOW TO GET?

Tourist visa for Egypt can be obtained from the Embassy of Egypt in New Delhi and the Consular office in Mumbai. Unlike many other countries, Egypt has not outsourced its visa work to a private agency like VFS or IFS. There is no provision for E-visa or Visa on arrival for Indians as of now (unless travelling in a large group). A single entry Tourist visa for Egypt cost Rupees 1,900. You can get the visa in 2 to 3 working days. Documents required to obtain a tourist visa for Egypt are mentioned below.
A tourist visa for Egypt is allowed for 90 days. However, a tourist can stay only upto 30 days from the arrival date in Egypt. No interview is conducted for issuing an Egyptian tourist visa, but applicants having no travel history (no visa stamps from other countries) may be called by the Visa office. Time of submitting the application form is between 9:30 am to 11:00 am. They also accept applications from agents or relative having a valid authorization letter. So it is not necessary to be personally present in the embassy or visa office to submit the visa application form.

Address and Contacts

Embassy of Egypt in Delhi
1-50 M, Niti Marg, Chanakyapuri,
New Delhi, Delhi 110021
Phone number Egypt Embassy – 011 26114096 – 011 26114097
Consulate General of Egypt in Mumbai
101 Benhur Apartments,
32, Narayan Dabholkar Road,
Navshanti Nagar, Malabar Hill,
Mumbai, Maharashtra 400006
Phone number Egypt consulate in Mumbai – 022 2367 6422

Working hours for Visa applicants (Delhi)

Visa Application submission time – 09:30 to 11:00 am (Monday to Friday)
Visa collection time – 03:00 to 03:30 pm (Monday to Friday)

Documents required for Egypt Tourist Visa

  1. 2 Passport size photograph
  2. Visa application form  
  3. Covering letter / Request letter to the Consulor
  4. Confirmed Air tickets
  5. Confirmed hotel bookings
  6. Travel Itinerary
  7. Bank statement – Six months (Minimum balance 50,000 INR), attested (stamped and signatured) by your bank
  8. Last 3 years Income Tax Return (not mandatory)
  9. Photocopies – First and last page of your passport
  10. Original passport

Monday, March 18, 2019

WHEN I GOT REFUND FOR DELAYED BULLET TRAIN | 12 DAYS IN JAPAN

Travelogue by – Navankur Chaudhary 
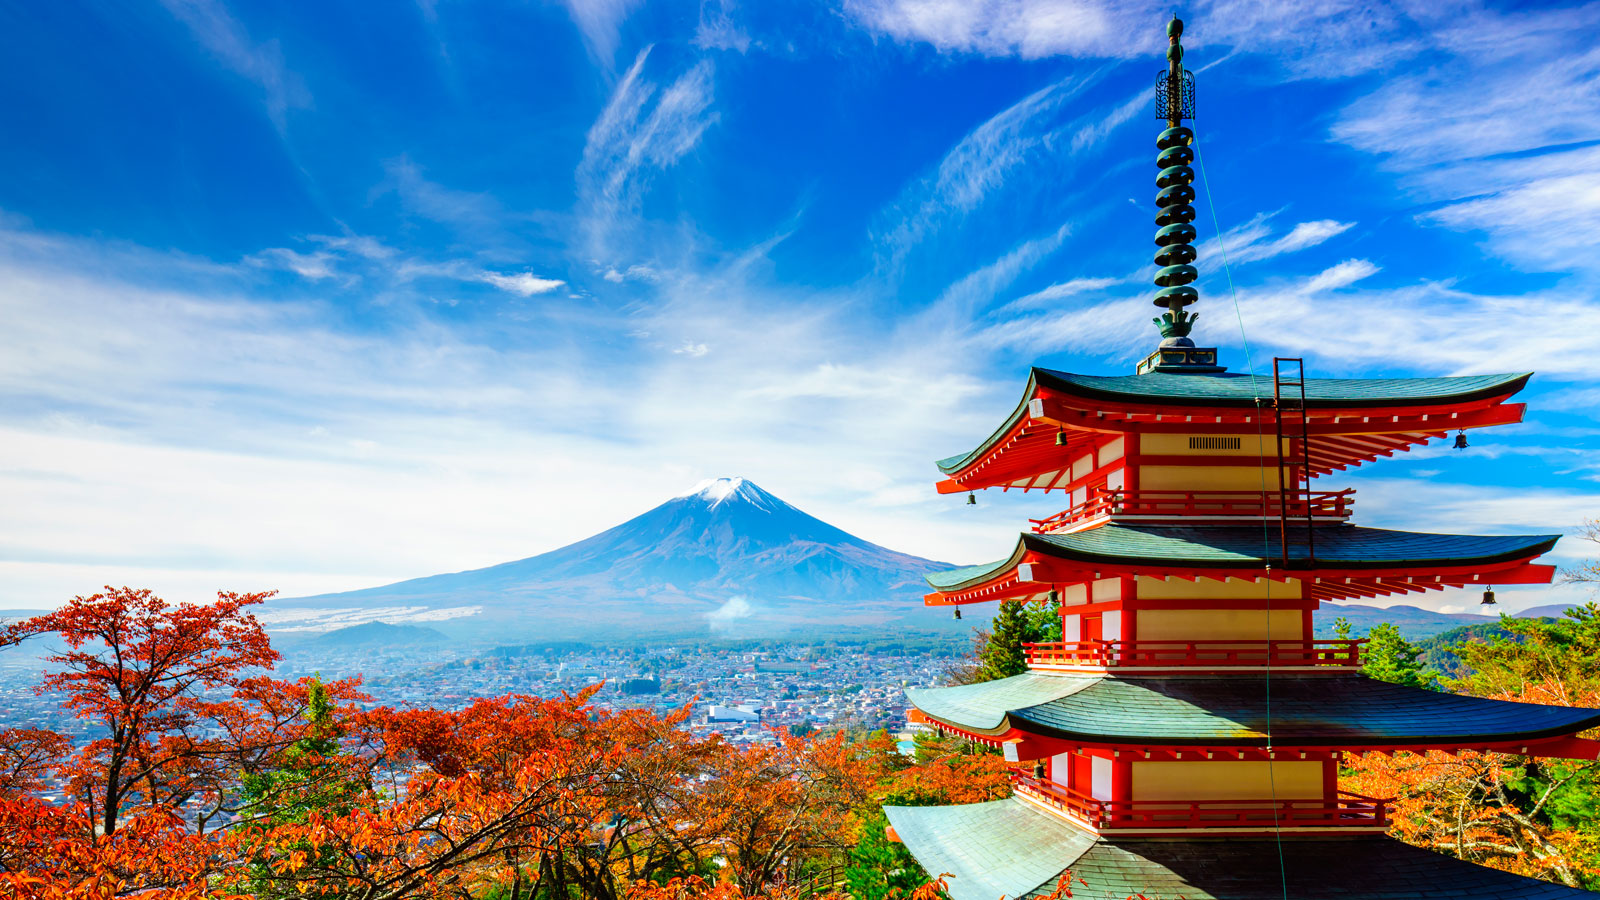
We all have seen Japanese anime and cartoons from our childhood and had a dream to visit Japan once in life to feel and see that country which made our childhood great. I also had the same dreams. My dream came true in September 2018 when I applied for Japan Visa and got it approved. I finally got to visit in October 2018 and spend 12 days in Japan.
Flight fare from India to Japan
Japan Flights from Delhi and Mumbai usually range from Rs 40,000-50,000 (Return fare). So I had to find a cheaper option. I searched for the flights with layovers. While doing so I also considered the layovers should be in those countries whose visa could be obtained easily being an Indian.

 Leg 1  | Delhi to Singapore

Initially, I was thinking of travelling via Hong Kong . This was Air Asia flight costing 11,000 INR connecting through Kuala Lumpur . But this time I wanted to travel with some airline other than Air Asia. So I took flight with Singapore Airlines. The ticket cost me 14000 INR with a 16 hours halt in Singapore. This was going to be my second experience in Singapore.  Check my travelogue to know how I travelled on a budget for 8 days in Singapore and Malaysia.

Leg 2  | Singapore to Hong Kong

The second leg of my Journey was from Singapore to Hong Kong which was also with Singapore Airline in morning. Another wonderful journey with Singapore Airlines.

Immigration in Hong Kong

On landing, I went through smooth Immigration in Hong Kong. Hong Kong Visa is also free but you have to do one Pre-Arrival Registration before arriving in Hong Kong and it is valid for 6 Months for Multiple Journeys. I had only one day stay in Hong Kong so I decided to take rest.

Leg 3  | HongKong to Tokyo with ‘HongKong Express’

Next Day I went to Hong Kong Airport to catch my flight to Tokyo. I booked Hong Kong Express which is a budget carrier like Air Asia. Flight ticket from Hong Kong to Tokyo was 3300 INR.
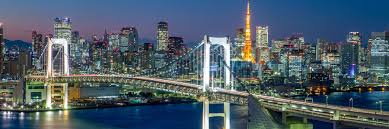
After landing in Tokyo
I landed on Narita Airport of Tokyo. This time I didn’t use my ATM card but I had US dollars. I purchased 72 hours metro card of Tokyo metro from airport and combo Airport Shuttle Express which cost me 2400 Japanese Yen (100 Yen = 65 INR). Mobile Sim card in Japan is expensive so I didn’t buy it.

Tokyo Airport to city centre

I took the Airport Shuttle to reach the City Centre and from there I took the Tokyo Metro to reach my apartment. But after reaching the apartment I didn’t find the apartment’s owner. I was stranded there for around 3 hrs. Only after that I got the keys. This apartment cost me 7000 YEN for 3 Nights for 2 People.

My experience in Japan’s Bullet Train

Now was the time to take the world’s famous ‘Bullet train’. Its official name is Shinkansen. That day due to an unfortunate mishappening all train from Tokyo to South Japan got delayed by 2 hours. But after reaching Hamamatsu, to my surprise, Japan Railways refunded 3380 Yen from my total ticket cost 8090 Yen. It was a great way to compensate the passengers for the delay.

Hamamatsu – Local sight seeing

In Hamamatsu, I stayed with one of my friends. We travelled with his local Japanese friend who actually had travelled in India.  He was very keen to know more about India. I have recorded the conversation in this video in which he shares his thought about Indians.
The same day we went to some of the tourist places in Hamamatsu like Airforce Museum and Limestone Cave. At night we had dinner in one of the Japanese Restaurants. I learnt how to hold the chopsticks the right way. Food in Japanese restaurants for dinner costs around 700-800 Yen

I learnt Japanese!

We are fascinated by the Japanese, Korean and Chinese language characters as they are totally different from all other languages. So I learnt a few of these words from my Indian friend who has been living in Japan for 2 years. There are around 20,000 Japanese alphabets which are called as Kanji in the Japanese Language.
Hamamatsu to Kyoto in a local train

After resting for 2 days at my friend’s place it was time to head for the next destination – Kyoto. Kyoto is the old Capital of Japan. I had already experienced the Bullet train so I decided to take a cheaper option which was the local train. There were around 4 stops between Hamamatsu and Kyoto. This journey gave me the actual experience of an average Japanese’ daily lifestyle. It took around 4hours to reach Kyoto from Hamamatsu.

I stayed in a Capsule hostel

Next adventure which was on the way was experiencing a Capsule hostel. However, Capsule Hostel are nowadays available everywhere in World but they started in Japan. So it was worth to stay for 1 night in this hostel. They are generally more expensive than the normal hostels. I paid 2360 Yen.

Hiroshima Nuclear dome site

Next morning I went to see the Hiroshima Atomic Bomb Dome. Yes, it is the same place where the world’s first Atomic Bomb was dropped. Now watching the city does not even feel like an Atomic bomb was detonated here. But thinking about that day just gave me goosebumps. I was approached by a volunteer guide whose father died due to radiation of the Bomb. She was so humble and polite throughout the tour that I won’t forget anything she told about Hiroshima city and the Atomic bomb.

Hiroshima to Hongkong flight

In Evening I had a flight back to Hong Kong. I took Airport Shuttle Bus to the Airport and reached just 30 minutes before departure. But the great staff of HK Express allowed me to board the plane. So I did not have to go back to Tokyo which saved my time and money. Flight from Hiroshima to Hong Kong by HK Express cost me 3300 INR.

Free Night stay at HongKong Airport

I reached Hong Kong in Night at around 10 pm. So decided to sleep at the airport only & not paying for the Hotel. Next morning I took the bus N21 to reach Tsim Tsa Tsui Street and booked a hotel room in Chungking Mansion which is ‘Mini India’ of Hong Kong. Even the Hotels are owned by Indians and Pakistanis. In the evening I went to see the Skyline of Hong Kong. I never saw such a large skyline before. Next day in the afternoon I had to leave for Macau as I had booked my return flight to India from Macau.

Hongkong to Macau in a ferry

Next day around 11 am,  I left my hotel towards the Macau Ferry Terminal. Walked for 1.5KM in search of fridge magnets.  I generally collect from every country but I was unable to find it there. HongKong to Macau Ferry cost between $150 HKD to $170 HKD. I took the ticket for 160$ HKD and immigration for HongKong is done in that building itself. The ferry took around 1 and a half hour to reach Macau. Macau Immigration is done after you deboard from the Ferry. Macau visa is free for Indians on arrival. I had whole evening and night to explore as Macau is popular for its nightlife.
After enjoying Macau for a short period of time I took Uber from somewhere in Macau to Macau Airport which cost 50 MOP. MOP is Macanese Pataca which is Macau currency which is equal to Hong Kong Dollars. I slept from 12-6 at airport and morning did check in and took my flight back to Jaipur from Macau via Bangkok. It cost me 9500 INR. The layover was for 3 hrs.

How much money did I spend on this trip?

I spent around 75,000 INR on this 18-days long trip. This cost includes flights, visa, hotels, food, Sightseeing and other charges.
  • 12 days in Japan (focus country of this trip).
    All other countries were bonus due to cheap flights
  • 3 days in HongKong
  • 1 day in Macau
  • 1 day in Singapore